


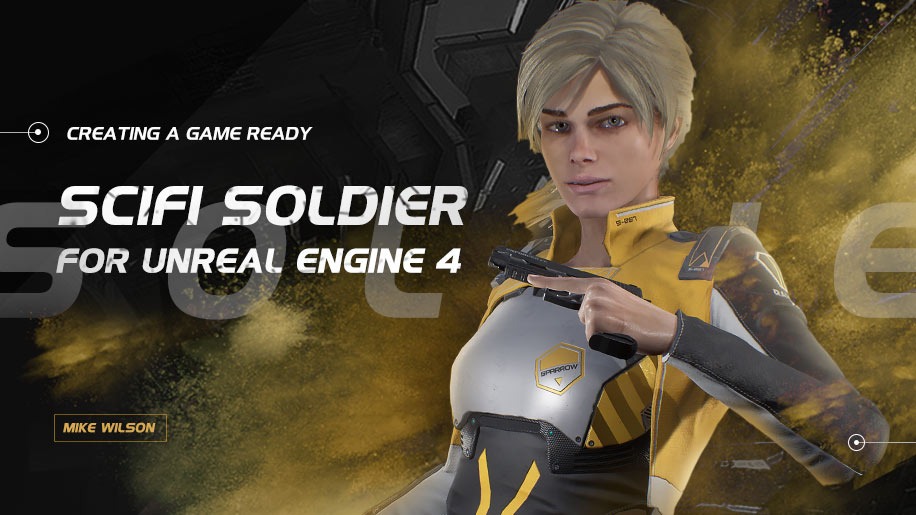
Creating a Game-Ready SciFi Soldier for Unreal Engine 4

Replay
WATCH NEXT FREE LESSON
Preview this course
8,393
English
unavailable
This course includes:
75
hours video
5
downloadable resource
Lifetime Access
Intermediate


Gift this course
Share Get the 18% off
-- : -- : -- : --
Creating a Game-Ready SciFi Soldier for Unreal Engine 4
unavailable
Creating a Game-Ready SciFi Soldier for Unreal Engine 4
8,393
English
This course includes:
75
hours video
5
downloadable resource
Lifetime Access
Intermediate
Gift this course
Share Get the 18% off
-- : -- : -- : --
225
Lessons
(Finish)
Section 1 - Course Introduction
Course Introduction and Trailer
 (2m 20s)
(2m 20s)
Section 2 - Gathering References
1.Gathering References
(27m 22s)
Section 3 - Concept Art
2.Blocking out the clothing
(26m 1s)
3.Detailing the clothing and design
(14m 27s)
Section 4 - Creating Clothes in Marvelous Designer
4.Marvelous Designer Process Overview
(12m 6s)
5.Configuring Marvelous Designer
(6m 51s)
6.Creating basic trousers
(14m 23s)
7.Adjusting the trousers
(19m 31s)
8.Placing internal lines in our trousers
(15m 27s)
9.Creating trouser pockets
(26m 30s)
10.Finishing the Seamlines
(15m 29s)
11. Finishing the trousers
(11m 59s)
12. Exporting the trousers to Zbrush
(12m 5s)
13. Creating a basic jacket
(13m 20s)
14. Shaping up the jacket
(21m 39s)
15. Exporting the jacket to Zbrush
(13m 15s)
Section 5 - Base-meshing in Maya
16. Creating the cap
(17m 21s)
Section 6 - Base-meshing in Zbrush
17. Creating the undershirt
(13m 58s)
18. Importing our Base meshes into Zbrush and CreatingThe Boots
(24m 16s)
Section 7 - Building in Maya and Sculpting in Zbrush
19. Masking out the chest armour
(23m 18s)
20. Shaping up the chest armour
(22m 26s)
21. Adding details to the chest armour
(18m 17s)
22. Shaping the jacket
(14m 46s)
23. Enhancing the jacket folds
(27m 5s)
24. More basic folds
(25m 30s)
25. Even more basic folds
(10m 39s)
26. Creating the shoulder pads and collar
(17m 43s)
27. Amending the jacket design
(25m 19s)
28. Creating some custom Alphas
(9m 1s)
29. Adding more folds to the jacket
(18m 31s)
30. Addressing the other sleeve
(14m 45s)
31. Adding smaller details
(21m 14s)
32. Finishing the jacket with details
(26m 57s)
33. Adding some folds to the trousers
(12m 10s)
34. Refining the trouser folds
(12m 7s)
35. Refining the trouser folds even more!
(12m 26s)
36. Adding pockets and seams
(21m 10s)
37. Adding additional seamlines
(14m 5s)
38. Shaping the cap
(26m 15s)
39. Sculpting the cap
(21m 37s)
40. Blocking out the holster and the straps
(25m 4s)
41. Adding pistol magazine pouches
(30m 9s)
42. Adding a strap fastener
(34m 50s)
43. Sketching out a holster design
(8m 29s)
44. Creating the holster
(26m 7s)
45. Unwrapping the holster
(32m 23s)
46. Finishing the holster
(13m 32s)
47. Threading the straps
(17m 3s)
48. Creating a belt buckle
(22m 20s)
49. Creating a tactical belt
(21m 6s)
50. Adding clips to the straps
(11m 53s)
51. Creating SMG pouches
(21m 33s)
52. Creating the utility pouches
(15m 55s)
53. Placing and arranging our equipment
(12m 1s)
54. Progress check and adding knee pads
(25m 40s)
55. Creating a dagger sheathe
(18m 1s)
56. Creating the dagger
(30m 3s)
57. Adding back armour
(25m 32s)
58. Refining the shapes of our equipment
(30m 34s)
59. Unwrapping the straps
(20m 56s)
60. Unwrapping straps and pouches
(25m 26s)
61. Continue to unwrap the pouches
(25m 47s)
62. Unwrapping the sheathe and the knee pads
(26m 40s)
63. Final equipment check and importing to Zbrush
(17m 58s)
64. Adjusting our trousers under our straps
(30m 23s)
65. Adding trouser folds around our equipment
(12m 3s)
66. Adding some folds to the satchels
(15m 37s)
67. Adding folds on the SMG pouches
(29m 21s)
68. Adding some folds to the utility pouches
(14m 49s)
69. Sculpting the undershirt
(22m 30s)
70. Sculpting fabric folds on the undershirt
(20m 31s)
71. Shaping and sculpting the boots
(31m 18s)
72. Adding a heel to the boot
(24m 57s)
73. Shaping the second layer of the boots
(19m 33s)
74. Refining the boot sole
(28m 16s)
75. Tweaking the boot shape and form
(29m 52s)
76. Creating an Alpha for the boot print
(15m 49s)
77. Sculpting folds for the boots
(27m 54s)
78. A quick note before starting the anatomy
(15m 57s)
79. Sculpting body and muscle definition
(17m 24s)
80. Starting on the hands
(23m 41s)
81. Sculpting some hand details
(29m 29s)
82. Finishing off the hands and fingers
(24m 24s)
Section 8 - Creating the Hair
83. Designing and concepting the hair
(24m 35s)
84. Sculpting our first hair cards
(24m 3s)
85. Starting on the ponytail
(24m 11s)
86. Creating some of the bangs
(25m 55s)
87. Creating additional A-Hair cards
(24m 16s)
88. Adding some B-Hair cards
(26m 22s)
89. Adding some ‘unruly’ hair cards
(30m 21s)
90. Finishing the hair and adding neck hair cards
(14m 57s)
Section 9 - Sculpting the Face
91. Identifying the facial forms from a photo
(19m 17s)
92. Changing the forms of the face and eyes
(23m 26s)
93. Eyes, cheeks and mouth shapes
(27m 56s)
94. Shaping the nose, chin and jaw
(12m 10s)
95. Adding finer forms to the face
(16m 59s)
96. Additional sculpting of finer facial forms
(17m 34s)
97. A quick chat about the level of sculpted detail
(10m 9s)
98. Addressing the shape and form of the ear
(10m 54s)
99. Adding sculpted detail to the lips
(23m)
100. Adding general detail to the brow and eyes
(24m 53s)
101. Adding further sculpted detail to the eyes and face
(18m 14s)
102. Sculpting neck details and final details pass
(17m 4s)
Section 10 - Finishing up in Zbrush
103. Checking through our sculpted character
(29m 23s)
104. Decimating and exporting low-polys and high-polys
(27m 14s)
Section 11 - Retopology in Maya
105. Retopologising the cap
(30m 25s)
106. Retopologising the body
(30m 20s)
107. Finishing off the body
(20m 51s)
108. Starting to retopologise the fingers
(20m 51s)
109. Moving onto the hands
(28m 46s)
110. Finishing retopology on the hands
(27m 14s)
111. Finishing retopology on the body
(8m 36s)
112. Retopologising the boots
(36m 41s)
113. Adding some low-poly detail to the boots
(20m 7s)
114. Adding some laces to the boots
(19m 29s)
115. Unwrapping the boots
(12m 32s)
116. Retopologising the undershirt
(18m 3s)
117. Using Zbrush to unwrap the trousers
(22m 40s)
118. Using ZRemesher to unwrap the jacket
(16m 9s)
119. Further retopologising of the trousers in Maya
(23m 6s)
120. Further retopologising the jacket in Maya
(23m 4s)
121. Re-creating the jacket armour and apron
(30m 47s)
122. Finishing up retopology on the jacket
(8m 58s)
123. Rebuilding the chest armour
(33m 4s)
124. Refining the chest armour
(16m 45s)
125. Placing and adjusting the straps
(4m 4s)
126. Retopologising the face
(3m 59s)
127. Further retopology on the face
(3m 32s)
128. Retopologising the ear
(27m 27s)
129. Final retopology considerations on the face
(29m 47s)
Section 12 - Unwrapping UVWs in Maya
130. Typing up our boots with laces and rings
(11m 58s)
131. Adding extra armour to our character
(20m 8s)
132. Unwrapping all the equipment
(18m 43s)
133. Unwrapping the jacket
(33m 49s)
134. Unwrapping the rest of the clothing
(32m 19s)
135. Unwrapping the straps
(29m 3s)
136. Unwrapping the pouches
(26m 31s)
137. Unwrapping the body
(19m 2s)
138. Unwrapping the hands and head
(9m 38s)
139. Unwrapping the hair
(11m 21s)
140. Compiling all our UVs
(19m 22s)
141. Exporting the game-resolution mesh for baking
(4m 27s)
Section 13 - Baking Maps
142. Baking out the clothing textures
(9m 4s)
143. Fixing up the clothing bakes
(18m 14s)
144. Baking out the jacket
(18m 22s)
145. Baking the head textures
(11m 4s)
146. Baking out the pouches
(26m 18s)
147. Baking the body textures
(6m 21s)
148. Baking out the armour textures
(17m 29s)
149. Reviewing all of our bakes
(2m 44s)
Section 14 - Texturing in Substance Painter
150. Creating ID maps
(21m 11s)
151. Finishing off the ID maps
(21m 56s)
152. Starting our Straps
(20m 20s)
153. Adding Insignia to the thigh plates
(23m 45s)
154. Adding stitches and texturing the dagger
(28m 45s)
155. Finishing off the straps
(14m 43s)
156. Starting on the chest armour
(33m 18s)
157. Adding extra details and finishing the chest armour
(21m 57s)
158. Leg armour and strap details
(26m 36s)
159. Adding wear and tear to the armour
(27m 37s)
160. Starting on our pouches
(16m 20s)
161. Finalising design ideas for the SMG pouches
(20m 10s)
162. Addressing the waist pouches
(21m 37s)
163. Texturing the satchels
(30m 35s)
164. Working on the holsters
(21m 1s)
165. Adding wear and tear and finishing touches to the pouches
(24m 19s)
166. Starting on the clothing
(29m 36s)
167. Iterating off our initial concept art
(30m 16s)
168. Blocking out the boots
(26m 38s)
169. Testing our materials in Marmoset Toolbag
(11m 44s)
170. Revisiting the clothing textures
(28m 58s)
171. Adding details to the clothing
(18m 40s)
172. Finalising insignias on the clothing
(25m 11s)
173. Adding stitches
(28m 16s)
174. Finishing up the clothing
(33m 49s)
175. Final mesh fixes in Maya
(24m 15s)
Section 15 - Skin, Face and Hair Textures
176. Creating the base skin textures in Substance Painter
(28m 28s)
177. Adding photographic hands
(28m 43s)
178. Finishing up the hands
(31m 14s)
179. Finishing the body texture
(25m 15s)
180. Texturing our face mesh with MARI Indie
(33m 27s)
181. Finishing up our face texture projection
(29m)
182. Editing our face texture
(30m 3s)
183. Finalising our face texture
(21m 22s)
184. Using Zbrush Fibermesh to generate hair textures
(20m 37s)
185. Placing our baked alphas in the hair UVs
(22m 47s)
186. Finishing up our base hair card textures
(17m 56s)
187. Creating our A-hair card textures
(24m)
188. Creating the B-hair card textures
(12m 45s)
Section 16 - Importing into Unreal Engine
189. Creating our Unreal project
(14m 26s)
190. Setting up a basic hair shader
(13m 3s)
191. Creating a depth and root map for the hair
(12m 54s)
192. Applying the new maps to the shader
(28m 54s)
193. Creating flow and extra depth maps for the shader
(22m 19s)
194. Creating the other necessary face maps
(20m 45s)
195. Addressing the brows and lashes with a basic texture
(17m 6s)
196. Unifying the skin textures
(14m 34s)
197. Setting up the photo studio in Unreal
(12m 17s)
Section 17 - Tweaking the Character
198. Tweaking the face and hair textures
(23m 41s)
199. Tweaking the brows and adding a hair tie
(26m 3s)
200. Fixing the eyelashes
(14m 54s)
201. Finishing up the eyelashes
(15m 26s)
202. Adding proper textures to the teeth
(27m 25s)
203. Finishing up with the tweaks
(16m 27s)
Section 17-2 - OPTIONAL Tweaks
204. Talking through the extra tweaks I’d like to make
(7m 1s)
205. Tweaking the face
(14m 19s)
206. Tweaking the hair
(19m 6s)
207. Final adjustments and tweaks
(20m 20s)
Section 18 - Rigging and Skinning
208. Creating some basic bones
(26m 31s)
209. Tweaking the orientation of the joints
(18m)
210. Adding extra bones and mirroring
(11m 30s)
211. Adding facial bones
(19m 35s)
212. Finishing up our skeleton
(30m 48s)
213. Starting to skin our character
(21m 17s)
214. Weight-painting our character
(22m 49s)
215. Joint reorientation and adding extra bone influence
(8m 40s)
216. Weight-painting the face
(23m 15s)
217. Tackling the pesky spine bones
(28m 12s)
218. Making some post-skinning mesh adjustments
(27m 52s)
219. Tackling the jacket
(15m 11s)
220. Adding extra blendshapes
(11m 44s)
221. Posing our character and importing Skeletal meshes to UE4
(27m 37s)
222. Importing the sparrow variations
(15m 3s)
Section 19 - Finishing Sparrow + BONUS
223. Introducing the studio and finishing the project!
(5m 36s)
224. EXTRA - Setting up editable custom colours in Unreal
(15m 58s)
225. EXTRA - Adding hair physics to our character
(16m 49s)
You must be purchased to post a comment.
Buy Now !
Start a Conversation
Ask a Question
Share a Project
Cancel
Post
There are no discussions for this course.
Buy now and unlock more
Go to see all discussions
Lecturer
Mike Wilson
Indie games designer and 3D character artist
Mike Wilson, as an indie games developer who specialises in 3D character modeling, has nearly a decade's worth of 3D experience now with a various list of tools, from Maya, Zbrush, Substance Painter and a few different engines, chief among which being Unreal Engine 4. He has worked on various horror projects, most primarily Deadlane which is developed by Vscape studios, and has created the main character model for Oddbreeze's The Grand Block Odyssey. Mike Wilson now is a freelancer and consistently works on his own Indie horror game project: Black Tears.
Please select the mode you want
Single
$
3 people
$x3
unavailable
